Handling File & Image Uploads
By Peter McNulty : 18-12-2004
4.30 (70)
Single File Uploads
One of the most common questions I see asked is, 'How do I let users upload files to my site, using PHP?' What seems like such a daunting task is actually very simple in PHP. Using some basic file functions and PHP's native support for handling form data, I'll demonstrate how to handle file uploads, and multiple file uploads.
To enable file uploads, we must first create a form designed to allow them. There are two things special about a HTML form which allows you to upload files. Take a look at this code:
Which looks like this:
As I mentioned, there are two things special about this form. Firstly and most obviously, we have a file select input field. This allows the user to select the file from their hard drive to upload. Secondly, and less noticeable, we have enctype="multipart/form-data" set in the form configuration. This item is necessary if you want your browser to upload the file. It just tells the server that we are sending both standard POST data as well as binary file data (hence 'multipart').
We also have set the form action to $_SERVER['PHP_SELF'] so that the form submits to itself.
PHP has a set of superglobals, specifically $_POST, $_GET, and $_FILES. The important one for us is obviously the $_FILES superglobal. This will contain several important pieces of data that we'll use. To find these out, we use print_r($_FILES) to show us the contents of the superglobal:
Here we can see that it $_FILES is a two dimensional array which contains the name of the file we uploaded, it's type, it's temporary storage name, and error code and the file size.
As we have not uploaded anything, most of the fields are empty however the important ones we'll use are name and tmp_name. When we submit a file to the server, PHP automatically stores the file in a temporary location. This location is set by the php.ini file, and tmp_name gives the name of this temporary file. This is a random unique name that is generated by PHP and will not be the same as the normal file name.
Hence, PHP does most of the work for us. The file is uploaded and automatically stored, so all we have to do is move this uploaded file into the right location, and save it with the correct file name. There are several ways to do this, as we can copy the file, rename it or move it. The most common method would be to move it using move_uploaded_file():
As you can see, PHP handles all of the dirty work, and all we have to do is move the file. We have specified the directory to save the file in, in $saveDirectory. As move_uploaded_file() takes two paths as arguments, then we can specify which directory exactly to save the file in. This function return false on failure so we can output a nice error message to the user. Also note that we check if the file has been uploaded, by checking if the name field is empty or not. This is quite a basic check, however, a more advanced check will be explained next.
The Form
To enable file uploads, we must first create a form designed to allow them. There are two things special about a HTML form which allows you to upload files. Take a look at this code:
The form
<html>
<head>
<title>File Uploader</title>
<link href="style.css" rel="stylesheet" type="text/css">
</head>
<body>
<form action="<?php echo $_SERVER['PHP_SELF']; ?>" method="post" enctype="multipart/form-data" name="upload">
Please enter a file to upload:<br>
<input name="ourFile" type="file"><br>
<input name="submit" type="submit" value="Submit">
</form>
</body>
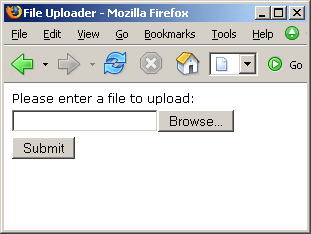
</html>Which looks like this:
As I mentioned, there are two things special about this form. Firstly and most obviously, we have a file select input field. This allows the user to select the file from their hard drive to upload. Secondly, and less noticeable, we have enctype="multipart/form-data" set in the form configuration. This item is necessary if you want your browser to upload the file. It just tells the server that we are sending both standard POST data as well as binary file data (hence 'multipart').
We also have set the form action to $_SERVER['PHP_SELF'] so that the form submits to itself.
How PHP handles file uploads
PHP has a set of superglobals, specifically $_POST, $_GET, and $_FILES. The important one for us is obviously the $_FILES superglobal. This will contain several important pieces of data that we'll use. To find these out, we use print_r($_FILES) to show us the contents of the superglobal:
Array
(
[ourFile] => Array
(
[name] =>
[type] =>
[tmp_name] =>
[error] => 4
[size] => 0
)
)
(
[ourFile] => Array
(
[name] =>
[type] =>
[tmp_name] =>
[error] => 4
[size] => 0
)
)
Here we can see that it $_FILES is a two dimensional array which contains the name of the file we uploaded, it's type, it's temporary storage name, and error code and the file size.
As we have not uploaded anything, most of the fields are empty however the important ones we'll use are name and tmp_name. When we submit a file to the server, PHP automatically stores the file in a temporary location. This location is set by the php.ini file, and tmp_name gives the name of this temporary file. This is a random unique name that is generated by PHP and will not be the same as the normal file name.
Hence, PHP does most of the work for us. The file is uploaded and automatically stored, so all we have to do is move this uploaded file into the right location, and save it with the correct file name. There are several ways to do this, as we can copy the file, rename it or move it. The most common method would be to move it using move_uploaded_file():
Move File
<html>

<head>

<title>File Uploader</title>

<link href="style.css" rel="stylesheet" type="text/css">

</head>

<body>

<?php

if (!empty($_FILES['ourFile']['name'])) {

    $saveDirectory = 'uploads/';

$tempName = $_FILES['ourFile']['tmp_name'];

    $fileName = $_FILES['ourFile']['name'];


    if (move_uploaded_file($tempName, $saveDirectory . $fileName)) {

        echo 'File Successfully Uploaded!';

    } else {

        echo 'There was an error whilst uploading the file.';

    }

} else {

    ?>

    <form action="<?php echo $_SERVER['PHP_SELF']; ?>" method="post" enctype="multipart/form-data" name="upload">

      Please enter a file to upload:<br>

      <input name="ourFile" type="file"><br>

      <input name="submit" type="submit" value="Submit">

    </form>

    <?php

    }

?>

</body>

</html>
As you can see, PHP handles all of the dirty work, and all we have to do is move the file. We have specified the directory to save the file in, in $saveDirectory. As move_uploaded_file() takes two paths as arguments, then we can specify which directory exactly to save the file in. This function return false on failure so we can output a nice error message to the user. Also note that we check if the file has been uploaded, by checking if the name field is empty or not. This is quite a basic check, however, a more advanced check will be explained next.
Page 1 of 3 >>
Build Your Own Database Driven Website Using PHP & MySQL
 |
|
Ads